U.S. Visa Application by yourself

Important note! The E-migrating editorial team does not provide consultations on self-applying for a U.S. visa and does not assist applicants. If you’ve decided to go through the entire process and apply for a U.S. visa independently, then use the materials on our website as a guidebook. However, if you are unsure of your abilities, you can contact one of the companies we collaborate with. The list of companies is provided below.
Applying for a U.S. Visa on Your Own
Getting a U.S. visa today is quite a challenging quest, especially considering the influx of immigrants to the United States. And it would be manageable if the visa processing fee wasn’t $160, which is non-refundable in case of denial. That’s why, when starting the process of applying for a U.S. visa independently, you need to pay close attention to every step, prepare thoroughly, and act correctly at the right moment.
Below, we will be discussing the process for obtaining a B1 tourist visa or a B2 business visa, as these are the most in-demand visas for the U.S. All other types of visas are not much different from those mentioned above. The only differences are in the additional forms to fill out and extra fees to pay. However, visas for talents, investor visas, and other similar categories are much more complex and often require the assistance of an immigration attorney. As for the B1 and B2 visas, these are types that can be obtained independently if you don’t have the funds to approach visa companies that help with long-term visa applications.
How to Apply for a U.S. Visa on Your Own
Let’s move on to the steps that will lead us to the desired goal. First, remember that being informed is being armed. Therefore, in addition to this article, it is worth reviewing our other publications on visa-related topics, guides on passing interviews, and more.
Now, let’s move on to the steps:
- Any tourist or business visa requires a clear plan for your trip to the United States, even if it’s just a visit to a distant relative. Therefore, the first step is to create such a plan. We select our travel plan: where we will go, what we will do, in what order, and what potential changes might occur depending on circumstances. Once this is clear, we can determine which type of visa is appropriate for our plan. If we are going to attend a specific conference and then explore some local bars, the B-2 visa will be perfect. However, if we plan to visit Disneyland, stay overnight at the Grand Canyon, take a cruise in the Caribbean, or attend a family wedding, the B-1 visa would be more suitable.Once you’ve decided, we recommend writing out your travel itinerary as a list, including the dates for visiting each place, and familiarizing yourself with them by reviewing information and photos.
- Next, we need to gather the required documents. In our case, we will consider the B-1 visa for a tourist trip. You can find a detailed list of required documents on the B-1 visa page. We will make a small note here: there are no unnecessary documents. Even if it’s documents related to real estate, it’s worth bringing them as proof that you have no immigration intentions and are firmly tied to your home country, guaranteeing that after traveling through the United States, you will return home. Depending on the country where your interview takes place, especially if the country and the language of your documents differ, it’s advisable to have everything translated into English. Notarization is not required. Even a simple translation will make it easier for the visa officer to understand your documents. However, we don’t recommend using a basic Google translation unless you’re confident in its accuracy, as even with synonymic similarity, the meaning can change.
- The third step is to fill out the DS-160 form. In this form, you must provide detailed information about yourself. This is a non-immigrant form, and all information provided will be thoroughly checked to ensure there is no intent to immigrate to the U.S. For detailed instructions on filling out the DS-160 form, we recommend reading the guide through the link. The article also contains important tips on filling out this form.
- The fourth step is paying the visa fee. At the time of writing, the visa fee for a tourist visa is $160. U.S. consulates in different countries may accept payments differently, so it’s best to verify the payment process either on the consulate’s website in the country where you are or through a call center. Payment methods and banks may vary from country to country. After paying the visa fee, you must keep the receipt, as the interview will not proceed without it. You’ll be asked for this receipt at the consulate on the day of your interview.
- Next, you need to register on the USCIS website, where you can submit an appointment request for a U.S. embassy interview through an online form. We recommend reading additional information about scheduling an interview at the U.S. embassy. After confirming your appointment, bring the interview invitation with you to the consulate.
- Biometric data collection is the penultimate step before obtaining the visa. You’ll be scheduled to visit a service center, where your fingerprints will be taken, and a photo will be captured before the interview. On this day, make sure to bring all your documents and a copy of your visa fee payment receipt.
- The actual interview is the final step before obtaining your U.S. visa. You should prepare thoroughly for this day. Before the interview with the officer, it’s a good idea to practice answering the officer’s potential questions in front of a mirror. Bring all supporting documents to the interview, demonstrating your travel plans in the U.S. and showing that once your tourist needs are met, you will leave the U.S. There is no need to overwhelm the officer with all your documents upfront, and it’s absolutely forbidden to pressure the visa officer with information about already purchased plane tickets. This may upset the officer, who could deny the visa just out of principle. Your answers should be concise and calm. There’s no need to tell long stories in response to the officer’s questions. Just smile naturally and briefly answer the questions. If you are approved, they will tell you right away and ask you to leave your passport for the visa to be affixed. If not, they will inform you of the denial. Within 2-3 business days, your passport will be returned with the visa.
Important Points for Interviews in Countries Other Than Your Birth Country
If you will be interviewing in a country other than your own, be prepared to conduct the interview in English. The officers typically know two languages — English and the language of the country where they are working.
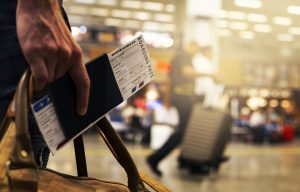


Table of Contents